No Copilot? No Problem! Get Free AI in VSCode Now
Tired of relying on paid tools like Copilot, Cursor AI, or ChatGPT? Here's how you can integrate a powerful and completely free AI assistant directly into your Visual Studio Code. Follow these steps, and you’ll have a personal coding guru at your fingertips—without any restrictions! Step 1: Set Up Your Groq Account Visit Groq Console. Create an account or log in. Navigate to API Keys and create a new key. Important: Copy and save your API key immediately—it’s displayed only once! Step 2: Install the Continue Extension Open Visual Studio Code. Search for “Continue” in the Extensions Marketplace. Install the extension. Step 3: Configure the Continue Extension Open the installed extension and click the gear icon (third icon from the right at the top of the page). A configuration file will open. Replace its content with the following: { "models": [ { "model": "AUTODETECT", "title": "Ollama", "apiBase": "http://localhost:11434", "provider": "ollama" }, { "model": "AUTODETECT", "title": "Groq", "apiKey": "YOUR_GROQ_API_KEY", "provider": "groq" } ], "customCommands": [ { "name": "test", "prompt": "{{{ input }}}\n\nWrite a comprehensive set of unit tests for the selected code. It should setup, run tests that check for correctness including important edge cases, and teardown. Ensure that the tests are complete and sophisticated. Give the tests just as chat output, don't edit any file.", "description": "Write unit tests for highlighted code" } ], "tabAutocompleteModel": { "title": "codeqwen", "provider": "ollama", "model": "starcoder2:3b" }, "contextProviders": [ { "name": "code", "params": {} }, { "name": "docs", "params": {} }, { "name": "diff", "params": {} }, { "name": "terminal", "params": {} }, { "name": "problems", "params": {} }, { "name": "folder", "params": {} }, { "name": "codebase", "params": {} } ], "slashCommands": [ { "name": "edit", "description": "Edit selected code" }, { "name": "comment", "description": "Write comments for the selected code" }, { "name": "share", "description": "Export the current chat session to markdown" }, { "name": "cmd", "description": "Generate a shell command" }, { "name": "commit", "description": "Generate a git commit message" } ] } Replace YOUR_GROQ_API_KEY with your saved API key. Save the file. Step 4: Start Using Your AI Partner! Highlight any code in your editor. Press Command + L (or the equivalent on your system) to open Continue. Ask questions, request code reviews, or generate solutions without limits! Why This Is a Game-Changer: Completely Free: Say goodbye to subscription fees! Unlimited Prompts: Unlike ChatGPT, you’re not capped by usage limits. Seamless Integration: Directly within your VSCode workspace. Customizable: Tailor commands to suit your needs. Experience a smarter, faster way to code. Set up your free AI assistant today and elevate your coding workflow to the next level!

Tired of relying on paid tools like Copilot, Cursor AI, or ChatGPT? Here's how you can integrate a powerful and completely free AI assistant directly into your Visual Studio Code. Follow these steps, and you’ll have a personal coding guru at your fingertips—without any restrictions!
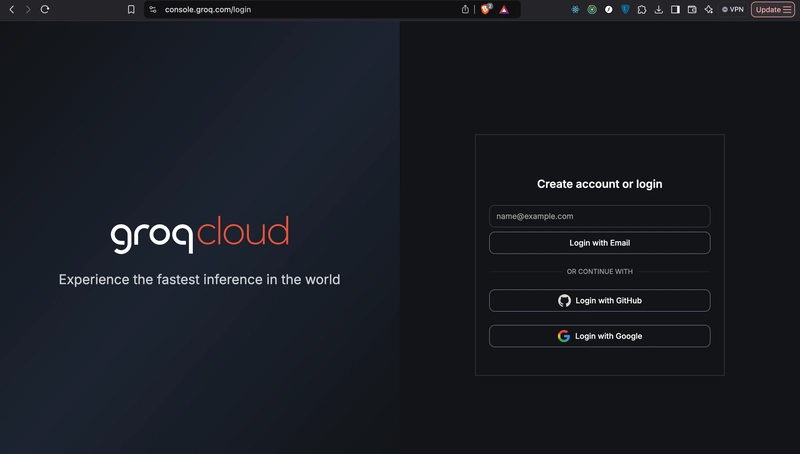
Step 1: Set Up Your Groq Account
- Visit Groq Console.
- Create an account or log in.
- Navigate to API Keys and create a new key.
- Important: Copy and save your API key immediately—it’s displayed only once!
Step 2: Install the Continue Extension
- Open Visual Studio Code.
- Search for “Continue” in the Extensions Marketplace.
- Install the extension.
Step 3: Configure the Continue Extension
- Open the installed extension and click the gear icon (third icon from the right at the top of the page).
- A configuration file will open. Replace its content with the following:
   {
     "models": [
       {
         "model": "AUTODETECT",
         "title": "Ollama",
         "apiBase": "http://localhost:11434",
         "provider": "ollama"
       },
       {
         "model": "AUTODETECT",
         "title": "Groq",
         "apiKey": "YOUR_GROQ_API_KEY",
         "provider": "groq"
       }
     ],
     "customCommands": [
       {
         "name": "test",
         "prompt": "{{{ input }}}\n\nWrite a comprehensive set of unit tests for the selected code. It should setup, run tests that check for correctness including important edge cases, and teardown. Ensure that the tests are complete and sophisticated. Give the tests just as chat output, don't edit any file.",
         "description": "Write unit tests for highlighted code"
       }
     ],
     "tabAutocompleteModel": {
       "title": "codeqwen",
       "provider": "ollama",
       "model": "starcoder2:3b"
     },
     "contextProviders": [
       { "name": "code", "params": {} },
       { "name": "docs", "params": {} },
       { "name": "diff", "params": {} },
       { "name": "terminal", "params": {} },
       { "name": "problems", "params": {} },
       { "name": "folder", "params": {} },
       { "name": "codebase", "params": {} }
     ],
     "slashCommands": [
       { "name": "edit", "description": "Edit selected code" },
       { "name": "comment", "description": "Write comments for the selected code" },
       { "name": "share", "description": "Export the current chat session to markdown" },
       { "name": "cmd", "description": "Generate a shell command" },
       { "name": "commit", "description": "Generate a git commit message" }
     ]
   }
- Replace
YOUR_GROQ_API_KEYwith your saved API key. Save the file.
Step 4: Start Using Your AI Partner!
- Highlight any code in your editor.
- Press Command + L (or the equivalent on your system) to open Continue.
- Ask questions, request code reviews, or generate solutions without limits!
Why This Is a Game-Changer:
- Completely Free: Say goodbye to subscription fees!
- Unlimited Prompts: Unlike ChatGPT, you’re not capped by usage limits.
- Seamless Integration: Directly within your VSCode workspace.
- Customizable: Tailor commands to suit your needs.
Experience a smarter, faster way to code. Set up your free AI assistant today and elevate your coding workflow to the next level!


